To save you some time, we have created a video showing each step of the article. You can watch the video below.
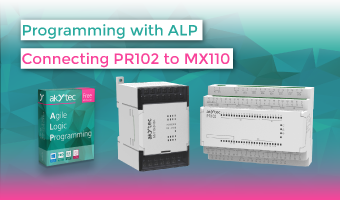
- This is a sample project on how to use the MX110 modules the corresponding Configurator Mx110 and ALP software. The goal of the project is to use the PR102 to acquire and transmit measured values and control digital inputs and outputs via the modules.
- For this we need a PR102, the I/O modules MU110-24.8I, MV110-24.8A, MK110-24.8D.4R and a Pt1000 temperature sensor.
Step 1: Configuration of MX100 modules
Note: Please note that the module is connected to a PC via a RS485 interface. You can use the akYtec converter or any USB-RS485 converter for this purpose.
When the module is connected to the configurator for the first time, it is connected according to the factory settings. Then the network parameters are read out. These are set and saved as shown in the picture. If the connection does not take place, set the corresponding COM port and click on "Use factory settings" as shown in the figures below.


If the device was previously connected, enter the previously used settings and click "Connect".
Note: To restore the factory settings, please refer to the device's instruction manual.

Set the network parameters that you want to use later in the akYtec ALP for PR102, such as baud rate, device address and protocol.
The procedure for the MV-110-24.8A and MK110-24.8D4R modules is the same. Set the network parameters that you want to use later in the akYtec ALP for PR102, such as baud rate, device address and protocol.
MV110-24.8A settings.
In case of the MV110-24.8A the input signal has to be set additionally. It is sufficient to set the type of the connected sensor for the first steps.

MK110-24.8D4R Settings

Step 2: Connecting the devices
As shown in the picture, the modules are connected to the PR102 via the RS485 interface and the DTS125L-PT1000 is connected to the analog input 1 of the MV110-24.8A.

Connection diagrams can be found in the devices' instruction manuals. The instructions can be found at the links below:
Step 3: Programming in akYtec ALP
Create a new project after starting the akYtec ALP and select the PR102. Then the serial COM port is set over which the PR102 is connected.
The RS485 interfaces are set up via the device configuration and network variables are created. The settings must be the same as for the MX110 modules! (see pictures below).

The respective Modbus registers were taken from the instruction manuals of the individual modules.
Step 3.1 MU110-8I
In case of the MU110-8I module, this is table 6.2, section 6.3. As of here, you need information about the register and the data type in which you want to use the data.
Note: The device address is the same as in the module settings


Step 3.2 MV110-8A
In case of the MV110-8A module, this is the Table 6.1, section 6.3.

Note: The device address is the same as in the module settings.

Step 3.3 MK110-8D4R
In case of the MK110-8D4R module, this is the Table 6.1, section 6.3.

Note: The device address is the same as in the module settings.

The circuit is constructed as follows:

The network variables are connected to the corresponding variables.
It should be noted that the input AI1 is also set to the input signal 4-20mA.
You can test the functionality of the circuit by enabling online debugging mode.


You can find a video on this topic on our Youtube channel or by clicking at the link.
You can download the software listed below for free on our webpage.